31
How to make things for Sex Sim / How to use custom textures (Character Creation)
« on: October 09, 2010, 07:41:52 PM »
Note: The following information is out of date with the introduction of the new Character Editor but will be left here for reference. Please see this thread for more up-to-date info.
This is the beginning of a new tutorial. I'll be adding to it as the days go on but I wanted to get it out there so people can start messing around. I'm starting with female characters and then after I do a little more testing I'll extend the tutorial to include males as well. Please note that custom hair coloring is not yet implemented in the sim, so for now you'll have to use an existing hair style (or 'none' for bald).
This is an advanced tutorial and you should be familiar with graphic editing programs such as Photoshop, GIMP, or another, as well as understanding how to edit XML files, etc. It can also be somewhat confusing the first time around, so please pay close attention to these instructions. If you have any questions just ask.
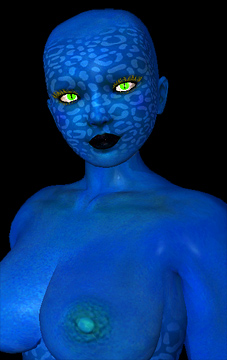
Mesdames et Messieurs, sans plus attendre, je vous présente...
Nuhkshalah, the Sexy Alien Girl from Venus
To get you started I've created a custom textured character that you can download and use in Sex Sim. I wanted to show just a hint at what can be done with this powerful feature so I gave her alien skin.
You can download her here: Nuhkshalah, the Sexy Alien Girl from Venus.
Just download the file and unzip it into your Sex Sim\Runtime folder. If all goes well you should now have a f-Nuhkshalah.xml file in your Sex Sim\Runtime\user_created\characters folder, and then some textures in the sub folders under that.
I'll be referencing those files in this tutorial so even if you're not into alien sex you will still want to follow along.
How to add your own custom textures to a female character
Making the Textures:
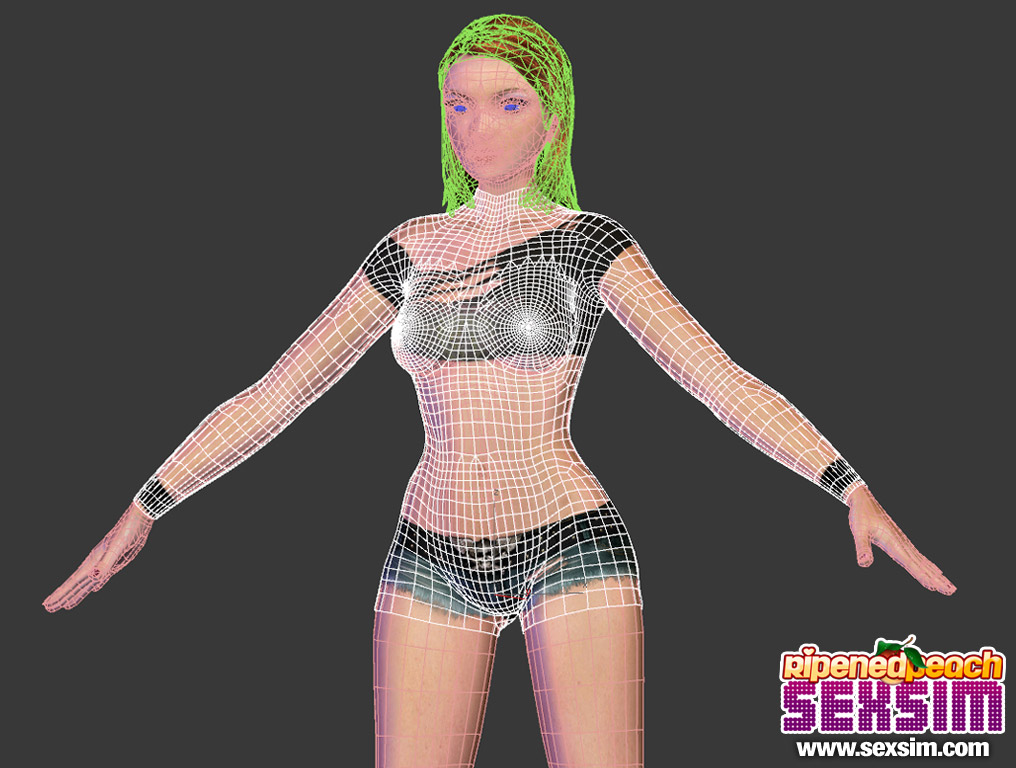
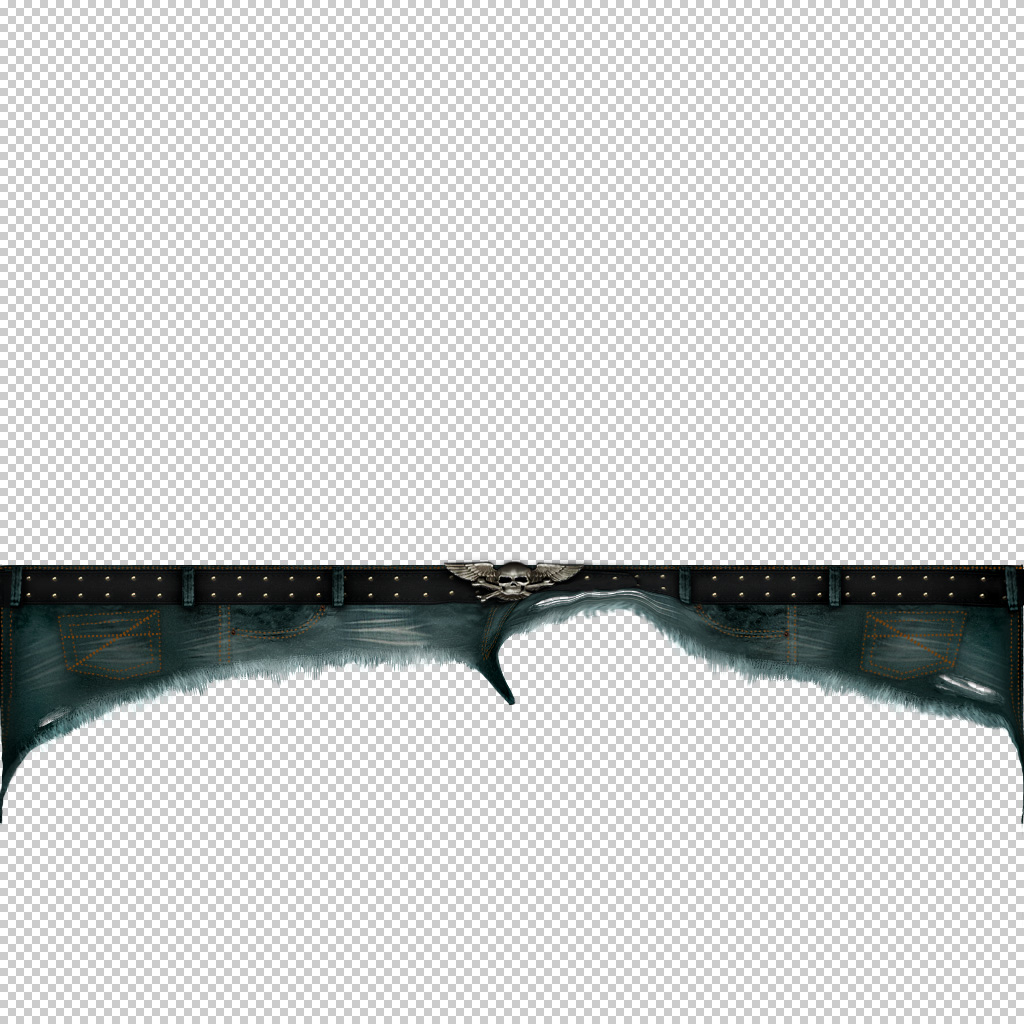
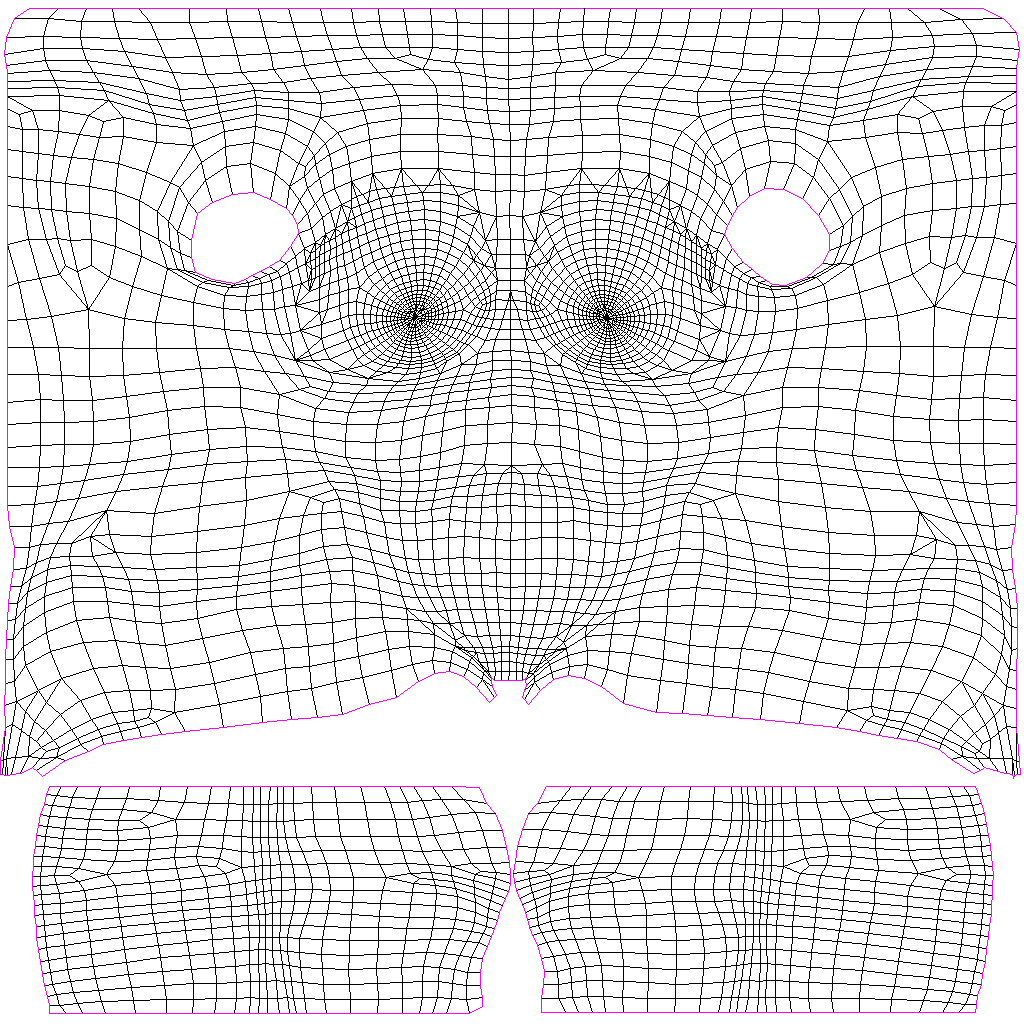
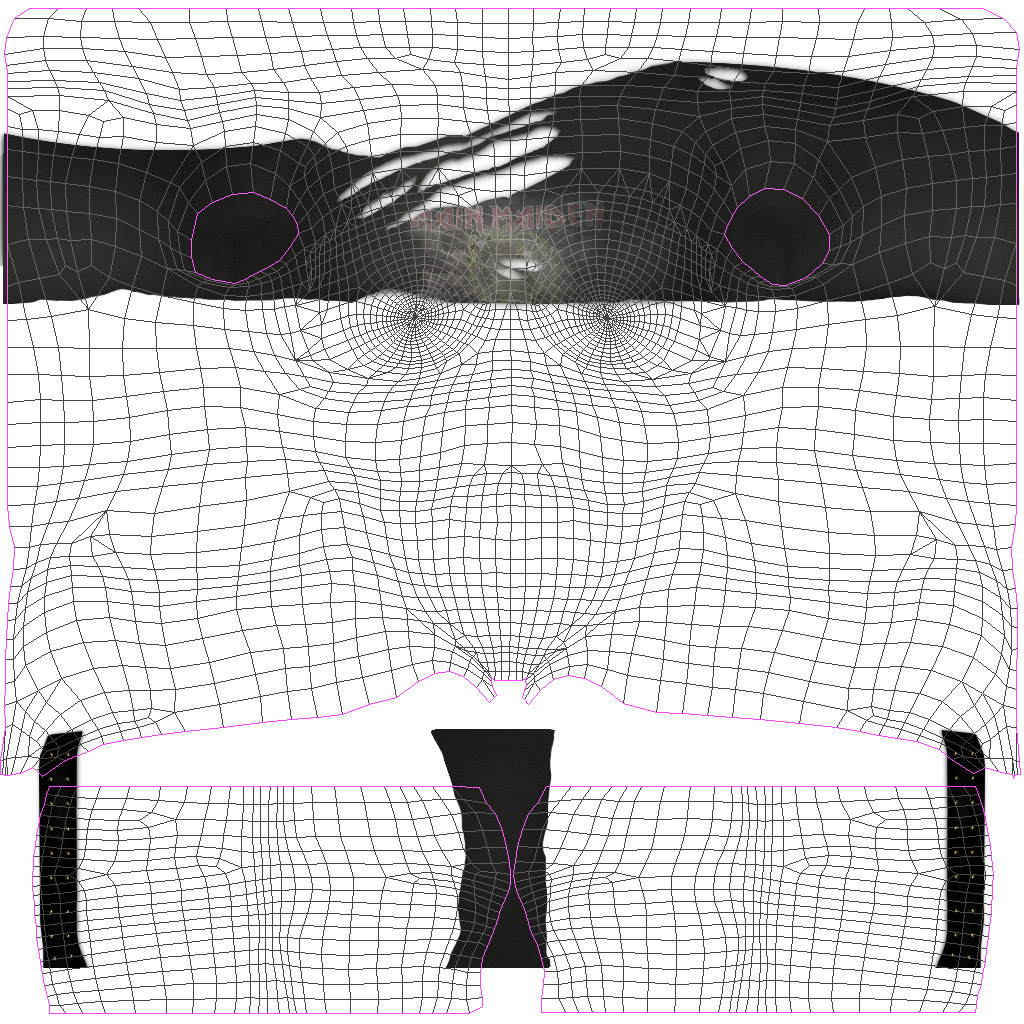
The female characters in Sex Sim use several texture maps over their body. As with custom clothing, you'll need to set up your maps to match the "UVW" coordinates that the 3d models use.
Please download this female UVW maps file to get all the UV maps you'll need. This is a zip file which contains all of the UVW maps in PNG transparent format, making it easy to put into a layer in your graphic editing application.
Each map is labeled with the appropriate parts so it should be easy enough to figure out what's going on.
When we created Sex Sim we decided it might be a good idea to use a UVW mapping scheme that was very similar to that used for the "Victoria 4" model in Poser. Since there are so many resources available online for that particular mapping format we figured it would make it an easier process for people working in Poser to start playing around with Sex Sim. Our textures have a few distinct changes from the Poser layout, but we kept them fairly close. If you're not familiar with Poser or Victoria 4 then don't sweat it, but if you are then you will have a head start in knowing how to texture Sex Sim girls.
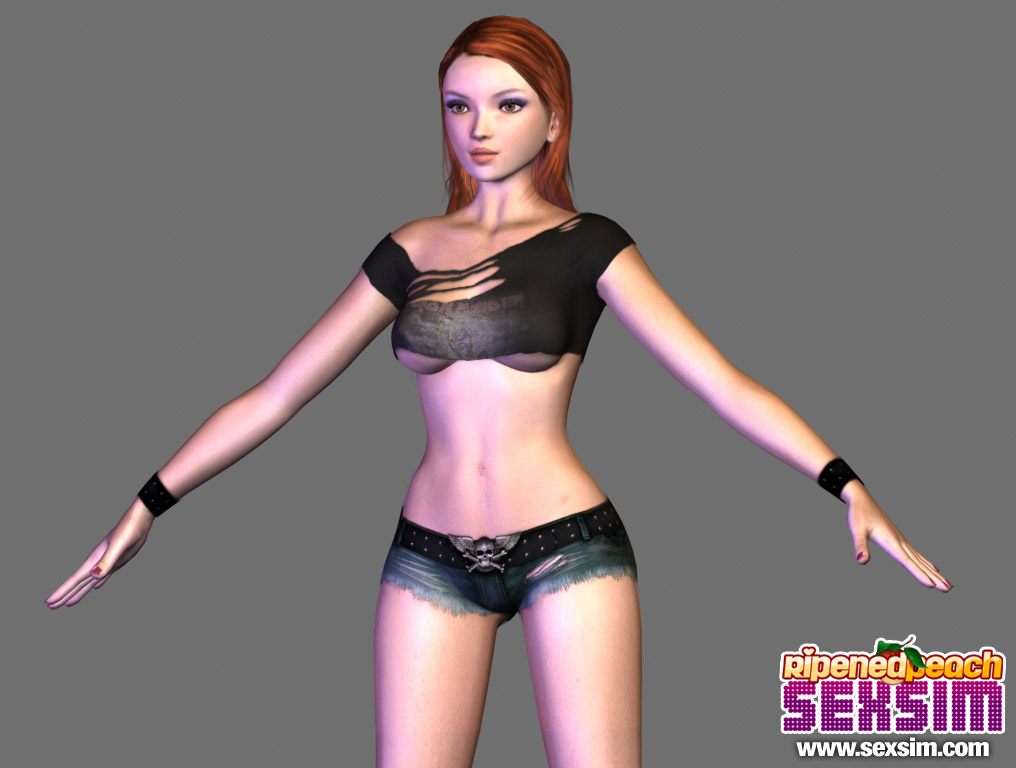
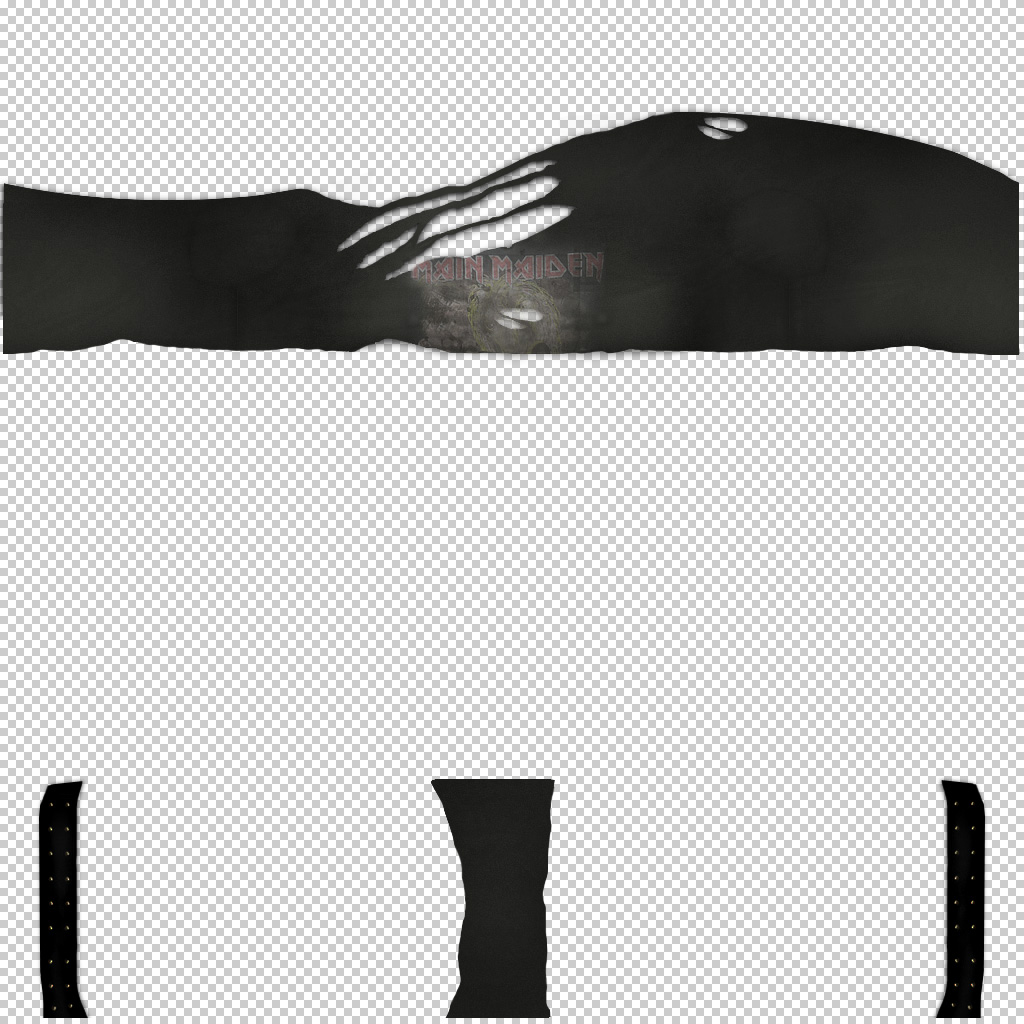
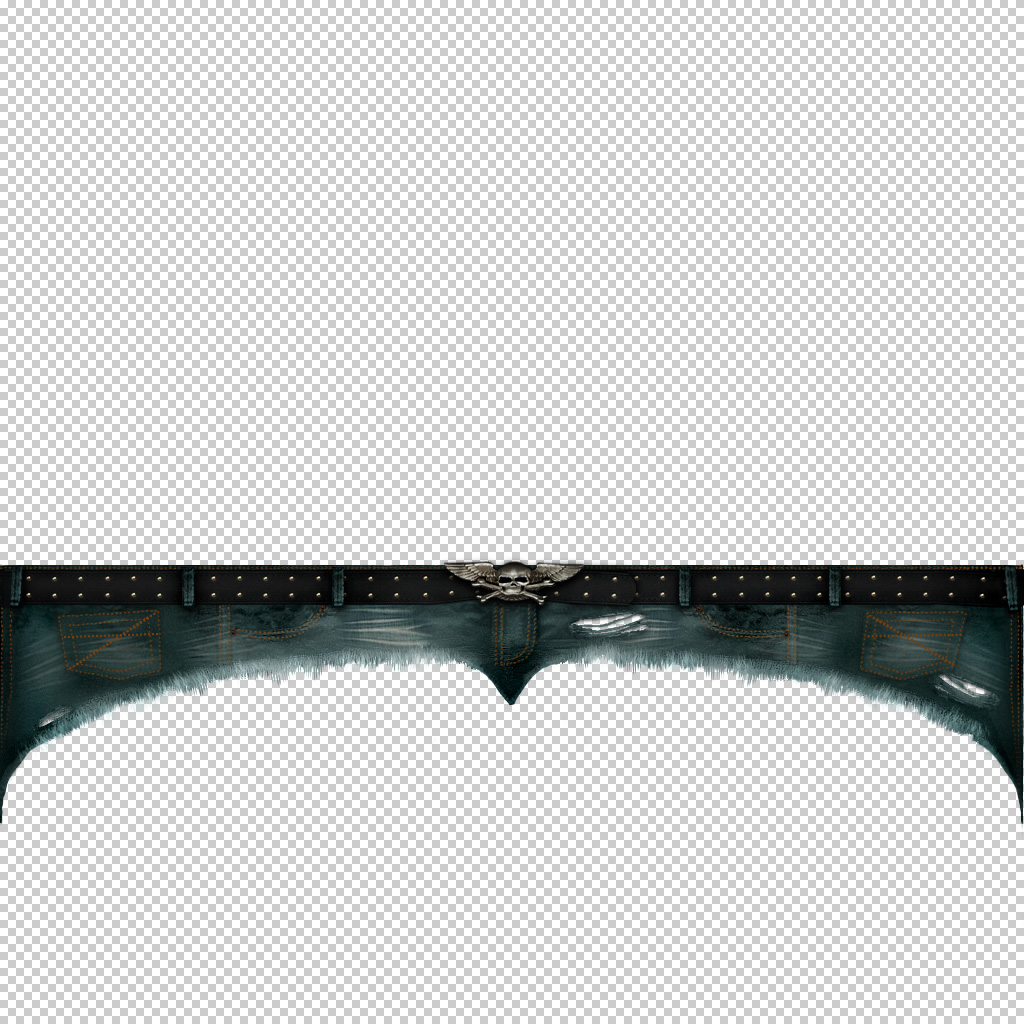
Here is a zip file containing base texture files for the female character. Each file has a few layers, including makeup, etc. so you can have something to work with as you make your own textures. I tested each file in Photoshop and GIMP.
Need the 3D meshes?:
If you are comfortable in a 3D editing environment you might want to download this zip file containing the 3D model meshes for each of the currently existing female body types in Sex Sim. They are in FBX format and have materials set up for HEAD, BODY, LIMBS, etc. making it relatively painless to plot your textures as you create them.
Here's the file: Sex-Sim_Female_Body_Meshes.zip
Saving your new textures:
When you have some textures you want to use on a character, you'll need to create a folder for Sex Sim to find them in. Go into the Sex Sim\Runtime\user_created\characters\textures\ folder and create a new folder. Name the new folder something unique, like your nickname or whatever you like. This will be the folder you enter into the TexSource tags in the XML file (continue reading for more info).
Save your textures into that new folder in PNG\transparent format. For every texture you save, you must use certain naming conventions to avoid problems. First, choose a "main name" for your character. Using my alien girl example, here is how I named the textures for her:
f_HEAD-blue_alien.png
f_BODY-blue_alien.png
f_LIMBS-blue_alien.png
f_TEETH-blue_alien.png
EYE-alien_green.png
EYELASHES-alien.png
Notice that each texture except for EYE and ELELASHES has a "f_" prefix. Make sure not to forget that so the sim knows this is a female character. Also, the HEAD, BODY, and LIMBS textures should all use the same "main name". When you specify the body texture in the XML file (see below), it uses the name you chose to grab all three of those textures.
Don't worry about the bump maps for now. In this tutorial we're going to use the bump maps that come with the sim, so there's no need to make custom ones or save them right now. I'll add to this tutorial later with info on making your own bump maps.
Putting the textures onto a character:
Now we'll get them into the sim...
Sex Sim uses XML files to tell it information about what textures a character uses. Please see the XML File Specs : Characters for full info about the character XML files.
Again using my alien girl as an example, here are the relevant sections from the XML file you'll need to address to use custom character textures...
<Author>Jak</Author>
<Gender>f</Gender>
<Race>Alien</Race>
<Home>Venus</Home>
<Name>Nuhkshalah</Name>
...
<Image>nuhkshalah</Image> *see section below about thumbnail and meter pics
...
<BodyTex>blue_alien</BodyTex>
<BodyTexSource>Jak</BodyTexSource>
<BumpTex>robyn</BumpTex>
<BumpTexSource>original</BumpTexSource>
<Hair>none</Hair>
<HairTex>none</HairTex>
<HairTexSource>original</HairTexSource>
<EyeTexL>alien_green</EyeTexL>
<EyeTexLSource>Jak</EyeTexLSource>
<EyeTexR>alien_green</EyeTexR>
<EyeTexRSource>Jak</EyeTexRSource>
<Eyelashes>alien</Eyelashes>
<EyelashesTexSource>Jak</EyelashesTexSource>
<Teeth>blue_alien</Teeth>
<TeethTexSource>Jak</TeethTexSource>
Please note that although some of our textures have a "f_" as their prefix, you should not use it in the XML file. Also, pay close attention to the "<BodyTex>" tag, as it contains the "main name" you chose when saving your textures, and you also don't need to specify HEAD, BODY, or LIMBS.
Also, if you don't want to do a custom texture for something like the teeth let's say, then you should specify the "TexSource" in the TexSource tag as "original". Just copy the relevant lines from an existing character if you like. That's what I did above for the bump map locations, since I haven't covered custom bump mapping in this thread.
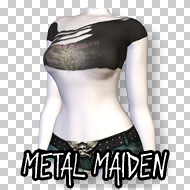
Don't forget the thumbnail and meter pics!:
Once you've got all that ready, you'll want to make the thumbnail and meter pics so your girl will show up in the sim. Again, please see the images that I've supplied with the alien girl if you need help with this. Also see the regular characters that you have installed.
Basically each character has a thumbnail image which is what you see when picking a character in the main menu, and each character also has a meter pic which is the tiny image you see on the lower left of the screen while in the actual sim.
The thumbnail image should always have a "tn_f_" as its prefix to tell the sim it's a thumbnail for a female character. The thumbnail image goes into the Sex Sim\Runtime\user_created\characters\thumbs\ folder. The thumbnail image should always have a upper case version of the name of the character, like this: tn_f_Nuhkshalah.png
The meter image should always have a "meter_" as its prefix to tell the sim it's a meter pic . The meter image goes into the Sex Sim\Runtime\user_created\characters\thumbs\m\ folder. The meter image should always have a lower case version of the name of the character, like this: meter_nuhkshalah.png
* If you are using Photoshop you can download this helper file for making the circular meter character pics: http://www.sexsim.com/files/tools/meter-chars-maker.zip -- Just unzip it and open the file in Photoshop. Paste your character image into the grouped folder (make sure the Robyn one that's in there isn't showing), scale the image, and save it out as a PNG.
Sharing your creations:
Ok, so you've got a character ready for the world and you want to share it.
PLEASE include a README.txt file inside your zip file with directions on where everything should go. Different people zip things up in different ways, and it will make things much more fun for everyone if we just simply include directions inside our files. That way no one ends up too frustrated with files everywhere.
Have fun!
So that's how to make your own custom character textures. I hope you all have fun with it and I can't wait to see some of the stuff you come up with.
This is the beginning of a new tutorial. I'll be adding to it as the days go on but I wanted to get it out there so people can start messing around. I'm starting with female characters and then after I do a little more testing I'll extend the tutorial to include males as well. Please note that custom hair coloring is not yet implemented in the sim, so for now you'll have to use an existing hair style (or 'none' for bald).
This is an advanced tutorial and you should be familiar with graphic editing programs such as Photoshop, GIMP, or another, as well as understanding how to edit XML files, etc. It can also be somewhat confusing the first time around, so please pay close attention to these instructions. If you have any questions just ask.
Mesdames et Messieurs, sans plus attendre, je vous présente...
Nuhkshalah, the Sexy Alien Girl from Venus
To get you started I've created a custom textured character that you can download and use in Sex Sim. I wanted to show just a hint at what can be done with this powerful feature so I gave her alien skin.
You can download her here: Nuhkshalah, the Sexy Alien Girl from Venus.
Just download the file and unzip it into your Sex Sim\Runtime folder. If all goes well you should now have a f-Nuhkshalah.xml file in your Sex Sim\Runtime\user_created\characters folder, and then some textures in the sub folders under that.
I'll be referencing those files in this tutorial so even if you're not into alien sex you will still want to follow along.
How to add your own custom textures to a female character
Making the Textures:
The female characters in Sex Sim use several texture maps over their body. As with custom clothing, you'll need to set up your maps to match the "UVW" coordinates that the 3d models use.
Please download this female UVW maps file to get all the UV maps you'll need. This is a zip file which contains all of the UVW maps in PNG transparent format, making it easy to put into a layer in your graphic editing application.
Each map is labeled with the appropriate parts so it should be easy enough to figure out what's going on.
When we created Sex Sim we decided it might be a good idea to use a UVW mapping scheme that was very similar to that used for the "Victoria 4" model in Poser. Since there are so many resources available online for that particular mapping format we figured it would make it an easier process for people working in Poser to start playing around with Sex Sim. Our textures have a few distinct changes from the Poser layout, but we kept them fairly close. If you're not familiar with Poser or Victoria 4 then don't sweat it, but if you are then you will have a head start in knowing how to texture Sex Sim girls.
Here is a zip file containing base texture files for the female character. Each file has a few layers, including makeup, etc. so you can have something to work with as you make your own textures. I tested each file in Photoshop and GIMP.
Need the 3D meshes?:
If you are comfortable in a 3D editing environment you might want to download this zip file containing the 3D model meshes for each of the currently existing female body types in Sex Sim. They are in FBX format and have materials set up for HEAD, BODY, LIMBS, etc. making it relatively painless to plot your textures as you create them.
Here's the file: Sex-Sim_Female_Body_Meshes.zip
Saving your new textures:
When you have some textures you want to use on a character, you'll need to create a folder for Sex Sim to find them in. Go into the Sex Sim\Runtime\user_created\characters\textures\ folder and create a new folder. Name the new folder something unique, like your nickname or whatever you like. This will be the folder you enter into the TexSource tags in the XML file (continue reading for more info).
Save your textures into that new folder in PNG\transparent format. For every texture you save, you must use certain naming conventions to avoid problems. First, choose a "main name" for your character. Using my alien girl example, here is how I named the textures for her:
f_HEAD-blue_alien.png
f_BODY-blue_alien.png
f_LIMBS-blue_alien.png
f_TEETH-blue_alien.png
EYE-alien_green.png
EYELASHES-alien.png
Notice that each texture except for EYE and ELELASHES has a "f_" prefix. Make sure not to forget that so the sim knows this is a female character. Also, the HEAD, BODY, and LIMBS textures should all use the same "main name". When you specify the body texture in the XML file (see below), it uses the name you chose to grab all three of those textures.
Don't worry about the bump maps for now. In this tutorial we're going to use the bump maps that come with the sim, so there's no need to make custom ones or save them right now. I'll add to this tutorial later with info on making your own bump maps.
Putting the textures onto a character:
Now we'll get them into the sim...
Sex Sim uses XML files to tell it information about what textures a character uses. Please see the XML File Specs : Characters for full info about the character XML files.
Again using my alien girl as an example, here are the relevant sections from the XML file you'll need to address to use custom character textures...
<Author>Jak</Author>
<Gender>f</Gender>
<Race>Alien</Race>
<Home>Venus</Home>
<Name>Nuhkshalah</Name>
...
<Image>nuhkshalah</Image> *see section below about thumbnail and meter pics
...
<BodyTex>blue_alien</BodyTex>
<BodyTexSource>Jak</BodyTexSource>
<BumpTex>robyn</BumpTex>
<BumpTexSource>original</BumpTexSource>
<Hair>none</Hair>
<HairTex>none</HairTex>
<HairTexSource>original</HairTexSource>
<EyeTexL>alien_green</EyeTexL>
<EyeTexLSource>Jak</EyeTexLSource>
<EyeTexR>alien_green</EyeTexR>
<EyeTexRSource>Jak</EyeTexRSource>
<Eyelashes>alien</Eyelashes>
<EyelashesTexSource>Jak</EyelashesTexSource>
<Teeth>blue_alien</Teeth>
<TeethTexSource>Jak</TeethTexSource>
Please note that although some of our textures have a "f_" as their prefix, you should not use it in the XML file. Also, pay close attention to the "<BodyTex>" tag, as it contains the "main name" you chose when saving your textures, and you also don't need to specify HEAD, BODY, or LIMBS.
Also, if you don't want to do a custom texture for something like the teeth let's say, then you should specify the "TexSource" in the TexSource tag as "original". Just copy the relevant lines from an existing character if you like. That's what I did above for the bump map locations, since I haven't covered custom bump mapping in this thread.
Don't forget the thumbnail and meter pics!:
Once you've got all that ready, you'll want to make the thumbnail and meter pics so your girl will show up in the sim. Again, please see the images that I've supplied with the alien girl if you need help with this. Also see the regular characters that you have installed.
Basically each character has a thumbnail image which is what you see when picking a character in the main menu, and each character also has a meter pic which is the tiny image you see on the lower left of the screen while in the actual sim.
The thumbnail image should always have a "tn_f_" as its prefix to tell the sim it's a thumbnail for a female character. The thumbnail image goes into the Sex Sim\Runtime\user_created\characters\thumbs\ folder. The thumbnail image should always have a upper case version of the name of the character, like this: tn_f_Nuhkshalah.png
The meter image should always have a "meter_" as its prefix to tell the sim it's a meter pic . The meter image goes into the Sex Sim\Runtime\user_created\characters\thumbs\m\ folder. The meter image should always have a lower case version of the name of the character, like this: meter_nuhkshalah.png
* If you are using Photoshop you can download this helper file for making the circular meter character pics: http://www.sexsim.com/files/tools/meter-chars-maker.zip -- Just unzip it and open the file in Photoshop. Paste your character image into the grouped folder (make sure the Robyn one that's in there isn't showing), scale the image, and save it out as a PNG.
Sharing your creations:
Ok, so you've got a character ready for the world and you want to share it.
PLEASE include a README.txt file inside your zip file with directions on where everything should go. Different people zip things up in different ways, and it will make things much more fun for everyone if we just simply include directions inside our files. That way no one ends up too frustrated with files everywhere.
Have fun!
So that's how to make your own custom character textures. I hope you all have fun with it and I can't wait to see some of the stuff you come up with.